ASA 5505 - Save backup of running configuration file via tftp
Before running an upgrade to the ASA operating system, I wanted to make a backup of the current running configuration in case of catastrophe. Ideally, that backup would exist somewhere not on the ASA device itself which involves getting something like write net to work. Fortunately, the process is not difficult but posting a few notes will hopefully save me from reinventing the wheel in a couple of years when I need to do this again. These steps are based on the a page from Dario Garavini and the Cisco support site.
Information regarding tftpd on debian (2017-07-26)
A few more notes which would have saved me ten or fifteen minutes today when attempting the same operation with a debian tftpd server. First installation is simple enough with
$ sudo apt-get install tftpd
By default, tftpd is configured in /etc/inetd.conf to use the directory /srv/tftp. But that directory is not created during installation. If necessary to restart inetd, the command is
$ sudo /etc/init.d/openbsd-inetd restart
Implied in the text below but not explicitly stated is before any file can be saved to the via tftp a corresponding filename needs to already exist on the server. The tftp-server command below sets the filename to asaconfig so a simple touch asaconfig in /srv/tftp will prepare the server for the incoming file. Failure to execute something like the touch command will result in the following: Error code 2: Access violation
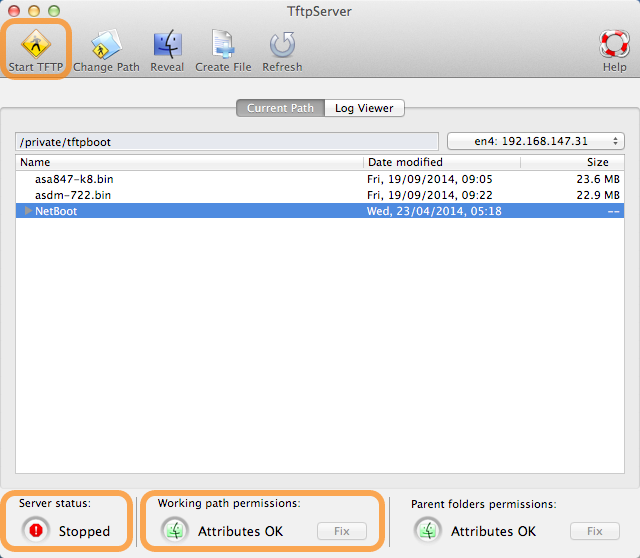
Mac OS X TFTP
While Mac OS X has its own TFTP server, a GUI interface makes the experience much more pleasant.
Once the TFTP manager is loaded, you can select the root directory for the TFTP server. The GUI does a nice job of alerting you to permissions errors for the directory, etc. Finally, make sure to start the TFTP service.
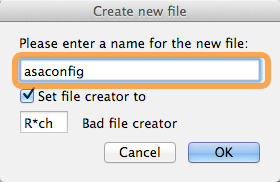
Create a new empty file for uploads
Click on the Create File button
![]()
Enter the desired filename and click OK
Even though nothing appears different in the application window, the empty file is ready to receive data from the ASA.
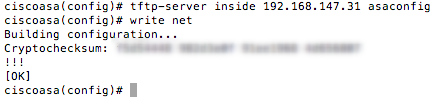
ASA CLI commands to write the config file
Set the tftp-server information and then issue the write net command.
Note the new file in the TFTP server application
The file is now visible and ready to copy elsewhere for safe keeping.
